About how to use iCloud Two-way Sync, please refer to the information below.
Version Requirements:
1. The eCalendar app must be version 1.41.0; You could download and update it on the APP store or Google Play.
2. The calendar frame must be updated to version 3.9.4.
1. In the eCalendar APP
Tap "Sync" → tap "Sync a New Calendar" → select "iCloud" → select "Two-way sync", then follow the guide below to complete the setup.
2. Authorized Account
Step 1: Turn on Two-Factor Authentication for your Apple Account
Open "Settings" on your phone → tap your Apple Account (your name) → tap "Sign-In & Security".
Tap "Two-Factor Authentication" and ensure at least one verification method is available. If no method is added, tap "Add a trusted phone number" to add a verification code method.
Once this step is completed, return to the eCalendar app to proceed to the next step.
Step 2: Generate an App-Specific Password
Tap and sign in to appleid.apple.com with your account and password (do not use Face ID). Once logged in, find "App-Specific Passwords".
Tap "Generate an app-specific password" → enter "eCalendar" in the input field → tap "Create" → long-press to copy the password (be sure to copy it! You won't be able to see the password after closing the window).
Step 3: Sign in to your iCloud Account
Return to the eCalendar App, tap "Next" → enter your Apple Account email and the App-Specific Password you just created → select the calendars you want to sync, then tap "Sync Calendar".
After the sync is complete, you can return to the calendar list to view the items synced from iCloud.
After enabling two-way sync, when creating an event in the eCalendar App, you can select to sync it to this calendar. After saving, the event will be synced to your iCloud calendar. You can also edit items synced from the iCloud calendar.
What if App-Specific Password generation fails?
If you cannot generate an App-Specific Password, you need to sign in using your password and two-factor authentication.
Tap and sign in via account/password, or choose to sign in with a Passkey.
After successful login, tap "Generate an app-specific password" → enter "eCalendar" in the input field → tap "Create" → long-press to copy the password, and continue the sync operation in the eCalendar App.
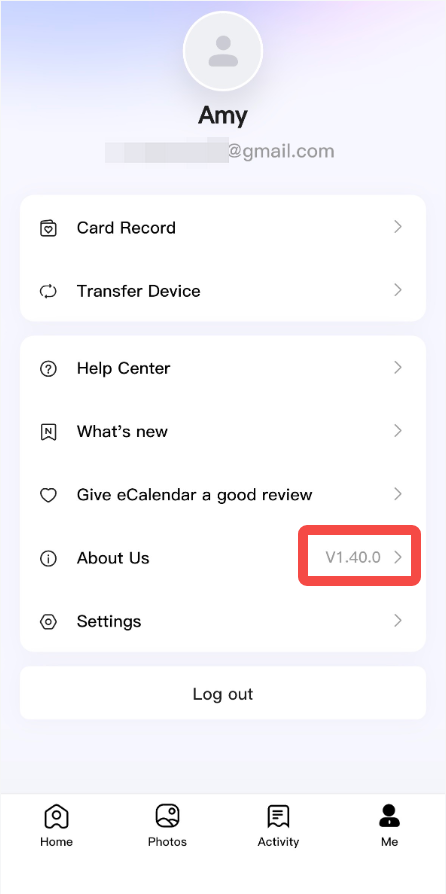
If your frame is not running version 3.9.4, please contact our customer support team for assistance with the upgrade. Kindly provide us with a screenshot of the "About" screen—for example, as shown in the image below.
Comments
0 comments
Please sign in to leave a comment.